“Hunter’s Pie”

Well, last week we got a stomach virus. So that was fun.

20161215_194725Anyway, Hubby got a deer this year, so we’ve been spending time processing and eating it. The roasts have been amazing, but I’ve been hesitant to make anything with the ground meat. I had this weird idea that ground venison wouldn’t taste so great so I kept putting it off.

I did a little experiment to see if shepherd’s pie would translate well with ground venison. I made a few adjustments to the recipe and it turned out pretty delicious so I’m sharing it with you guys! I’m really glad it turned out well because we have a lot of ground venison, so it’s nice to know that this is one option that’s palatable. Hamling even had two helpings!

Hunter's Pie

  • Servings: 8-10
  • Difficulty: medium
  • Print
5-6 medium potatoes, cubed
3-4 Tbs butter (or other oil)
1/4 cup almond milk
1/4 cup broth
1 cup frozen corn
salt and pepper to taste

1 lb ground venison
4 slices of bacon
1 Tbs butter (or other oil)
1/2 medium onion, diced
4 carrots, diced
4 cloves of garlic, minced
2 tsp rosemary
1 tsp salt
1/2 tsp marjoram
1/2 tsp ground black pepper
1/2 cup broth

  1. Fry bacon in a 3 qt oven-friendly dutch oven until crispy.
  2. While the bacon is frying, start boiling the potatoes. Boil them for 20 minutes.
  3. Remove the bacon and place on a plate. Melt the butter in the bacon grease and add the diced veggies. Cook until the onions are translucent, about 10 minutes. Add the venison, spices and garlic and cook until the meat is fully brown.
  4. If using fresh green veggies, add them with the broth. Bring to a simmer, cover, and turn to low.
  5. Preheat oven to 420°F
  6. Simmer the meat and veggies for as long as it takes to preheat the oven.
  7. At this point the potatoes should be done. Drain the potatoes, return to the pan and add the remaining ingredients. Mash until smooth.
  8. Crumble the bacon and set aside.
  9. When the oven is preheated add frozen corn and bacon to the filling and spread the mashed potatoes over top. Place in the oven and bake for 20 minutes, or until the potatoes start to get golden. Let sit for 15 minutes and then serve.

Super Awesome Secret #3!

I’m sorry I missed the last two Fridays. We all got sick, and then I took some time for Thanksgiving. Usually I try to have a scheduled post up for holidays, but I was busy taking care of sick children and we also had a trip to Grand Junction scheduled, so I decided to not overwhelm myself.

Anyway, on to the secret!

Today’s secret is: use broth. Preferably bone broth.

Any crock pot recipe, soup recipe, savory gluten free bread recipe that calls for water as the liquid can be improved by using broth instead.

On a similar note, using milk for sweet breads (like cinnamon raisin bread) is also awesome.

Using broth instead of water adds flavor and richness to any dish, and it can help gluten free stuff with structure issues (like pizza crust). Not only that, if you cook your rice in broth instead of water you sneak some extra nutrients and flavor into your meal.

If you’re dairy free, using broth instead of milk in mashed potatoes is pretty awesome as well.

Pro tip: when making Alfredo sauce (dairy free or not) try using half broth and half cream instead of regular half and half. So if your recipe calls for 1 cup of half and half use 1/2 cup of broth and 1/2 cup of cream. If you’re making shrimp Alfredo use seafood broth for an even richer flavor!

Salad Anatomy 101.

20160831_195731 I know it’s sort of late in the season to be writing about salads, but we’ve been eating a ton of them lately in an effort to be budget friendly. So I thought I’d share some tips for making a salad worth being a main course.

Mix greens.
I buy a head each of organic red leaf lettuce, green leaf lettuce, and romaine. I take them home, rinse them off, chop them up, and mix them well in a large bowl. This usually lasts me for a week and a half or more, depending on hubby’s work schedule. But, how do you keep your lettuce from browning? you ask. Storing chopped lettuce in a mason jar with a standard canning lid set (not a plastic lid) and a paper towel on the bottom really works. The lettuce will stay fresh for as long as 2 weeks.

I don’t recommend adding spinach greens to your salad raw because of their high oxalate content which prevents absorption of calcium. Beet greens are a bit problematic as well. If you have a yard that you don’t treat with chemicals, you can grab some dandelion greens for your salad. I wouldn’t recommend buying them: they cost almost $3 for a small bunch where I am, and that seems like a ridiculous price to pay for something that grows everywhere. Just be sure to pick leaves from plants that haven’t bolted yet (started growing a flower) so you’re greens aren’t overly bitter.

20160903_124044Multiple sources of protein.
I try to have meat of some form on my salads if I’m making one for dinner. I’ll put less meat or no meat at all on lunchtime salads because I usually want a lighter meal for lunch.
Other than meat I like to add different kinds of sprouted beans. You can use whatever kind of beans you like; they don’t necessarily need to be sprouted. I sprout mine for better nutrient absorption, and I like the way they taste, but it’s totally optional. A bonus with using cooked and cooled beans is that you get some resistant starch with your salad, which helps your digestion.
Soaked and dried nuts are also a great addition to salads because they add a delightful crunch.

Something raw other than the greens.
Think sliced tomatoes, shredded carrots, avocados, etc. If you’re struggling with thyroid issues, avoid eating raw cruciferous veggies.

Fermented veggies or pickled veggies.
I like to top my salads with some purple cabbage cortido, because it’s delicious (even though I hate sauerkraut) and crunchy. It also adds a delightful tang to your salad. If I don’t have any on hand I like to chop up some pickles, pickled okra is good as well, or artichoke hearts. Olives are also delicious.

Sprouted seeds.
I love putting sprouted and dried sunflower seeds on top of my salad. This is something I picked up from my awesome mother-in-law. She makes incredible salads.

Dressing.
I find that sometimes I don’t even need dressing if I’ve put enough stuff on the salad, but my go-to dressing recipe is below (this is a good dressing if you’re fighting a candida overgrowth):

Lemon Salad Dressing

  • Servings: 2 cups
  • Difficulty: easy
  • Print
1/2 cup fresh squeezed lemon juice
1/2 cup filtered water
1 cup olive oil
1 tsp ground mustard
1/2 tsp salt
1/2 tsp ground black pepper

  1. Combine all ingredients in a jar. Shake well. Serve.

Really, the possibilities are endless. These are just some suggestions based on things that I have found to take a salad from good to great.

What do you usually put on your salads?

Two Pot Beef Shepherd’s Pie!

IMG_0915Shepherd’s pie is a staple at our house. It’s hearty, it’s easy to cook, and it’s delicious, so I make it often. Not to mention the amount of leftovers we get out of it. This dish is a great way to stretch that expensive grass-fed ground beef.

I also take this to friends who are in need of a meal. I’ll pick up one of those disposable barbecue pans and bake it in there. If you’re going to do that, just cook everything in a large pan and transfer to the disposable pan for baking before adding the frozen veggies.

Beef Shepherd's Pie

  • Servings: 6-8
  • Difficulty: easy
  • Print
1 lb grass-fed ground beef
4-6 medium carrots, diced
1/2 large red onion, diced
4 cloves of garlic, minced
1 teaspoon oregano
1 teaspoon sea salt
1/2 teaspoon ground black pepper
1 cup frozen corn
1 cup frozen peas
1 cup green beans
1/2 cup broth

6 large potatoes
1/2 – 1 cup broth
1/4 – 1/2 cup butter
salt and pepper to taste

  1. In a 3 qt cast iron dutch oven melt your cooking fat over medium heat. When it starts to shimmer add the onions. Cook until the onions are slightly translucent and add the carrots. Cook for 1 minute before adding the beef. Cook until all of the beef is brown, about 10 minutes.
  2. Meanwhile, bring water to a boil in a large pot. Cut the potatoes (and peel them if you like). When the water is at a rolling boil add the potatoes, reduce heat to medium-high and set a timer for 20 minutes.
  3. Right after adding the potatoes pour broth into the dutch oven with the meat. Add the garlic and fresh green beans (if using frozen green beans, do not add them now). Cover, reduce heat to medium-low and simmer while the potatoes boil.
  4. Preheat the oven to 420°F when your timer is at 10 minutes.
  5. When the timer goes off strain the potatoes. Let them cool for a second in the strainer while you add your frozen veggies to the dutch oven.
  6. Return the potatoes to the pot with butter and broth starting with the lowest measurement. Mash, adding butter or broth as needed for a creamy, spreadable consistency. If you need this to bee 100% dairy free you can use lard or olive oil instead.
  7. Spread the potatoes over the shepherd’s pie mixture in the dutch oven. Start at the edges and work in.
  8. Pop the dutch oven in the oven once it’s preheated and bake, uncovered, for 20 minutes, or until the peaks of the potatoes start to brown.
  9. Allow to cool for 15 minutes before serving.

Notes:
If you’re avoiding nightshades you can try mashed cauliflower, parsnip or sweet potato instead of regular potatoes.

Bone Broth.

Bone broth is a nourishing and cost-effective way to add nutrients to your soups and other recipes that call for broth. But what about the summer? Soup isn’t exactly a good summer meal, especially if you live somewhere that gets above 85°F, so how do you incorporate bone broth into your diet when soup sounds like the most terrible thing you could eat?

Grains. There is some research indicating that the nutrients in grains that have been properly prepared are even better absorbed when eaten with organ meats, bone broths, or animal fats. In the summer time I cook all of my grains in broth instead of water. It adds a nice rich flavor and it’s a good way to consume bone broth if you don’t like the broth itself. Not only that, but it makes your meal more filling for longer.

Potatoes. Use broth instead of milk in mashed potatoes. This also makes mashed potatoes more palatable for dairy-free kids and adults in my experience. And, if you’re like me, broth is less expensive than the milk you’d be using.

Gluten-free breads. Gluten-free bread always needs structural support and sometimes needs a helping hand with texture. Bone broth lends a hand to both of these problems, particularly with pizza crust.

Broth

So how do you make bone broth? It’s super easy. All you need is a stock pot, crock pot or pressure cooker, chicken bones (or any kind of bones), some water, seasonings, apple cider vinegar, and vegetable scraps.

Stock pot: place chicken bones (or other bones), vegetable scraps, and a dash of cider vinegar into the pot. Cover with water and bring to a boil. Reduce heat to medium-low (enough to maintain a slow simmer), cover and let it cook overnight, or two days. Strain and store.

Crock pot: same as stock pot, except put the crock pot on high for a few hours and then switch to low. Let cook for two days.

Pressure cooker: same as stock pot. Make sure all of your ingredients sit below the 2/3 fill line. Lock the top, turn heat to high and raise to the recommended pressure in your manual (mine is 15). Reduce heat to medium to keep the pressure steady and cook for 30-45 minutes. Turn the heat off and let the pressure cooker come down to 0. I don’t remove mine from the heat, I let it cool on top of the burner. You can let it sit for even longer. I let mine cool past depressurization because I have a mondo pressure cooker that cooks several gallons of broth at once. It’s so large that I have to wait or I’ll burn myself trying to strain the broth.

If you get backed up with broth just save your bones and vegetable scraps in the freezer. I cook 3 chickens at a time with whatever scraps I’ve amassed in the time it takes us to consume all of the broth, so there are always bags of chicken bones in my freezer left from roast/boiled chickens.

Broth will keep for a week or two in the fridge and up to 6 months in the freezer.

You don’t have to throw the bones/veggies you strain away if you have pets. Our cats love the eat the skin and I give our dog any bones I can mash between my fingers easily and without any kind of splintering and the carrots/celery/squash cuttings. It makes for happy pets. I’ve also known people who compost the leftover bones/veggies. I throw whatever I can’t give to our pets in the trash, because the compost system we have is a bag on the counter top. That bag gets plenty full without adding animal bones.

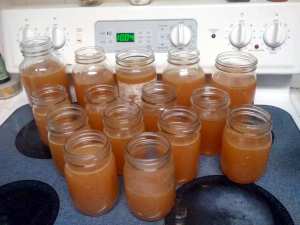
To freeze the broth in mason jars: fill pint jars with broth, leaving an inch of space on the top. Loosely cover with the lids and rings and let cool for a few hours on the counter top. Place in the refrigerator overnight (at least) before freezing. Once the broth is frozen you can tighten the canning rings to prevent freezer burn, but leave them loose until the liquid is completely frozen. Do not use quart or half-gallon jars; quart jars have about a 50/50 chance of cracking and the half-gallons crack every time in my experience.

If one of your jars breaks for some reason you can run it under very hot water to take the glass off and then run the resulting block of broth under hot water for a little less than a minute, making sure the water gets all sides. This way any tiny pieces of glass are melted off and go down your sink instead of into your food and you don’t have to throw the whole jar of broth away.
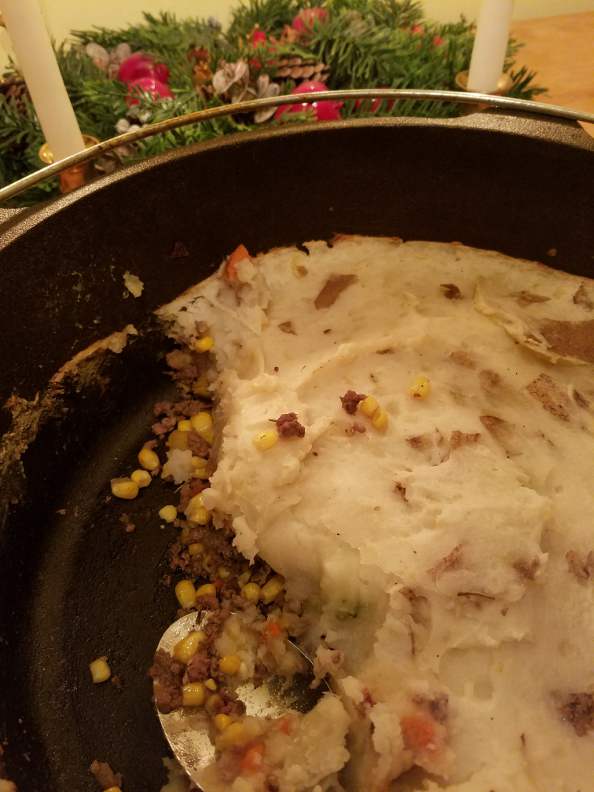
Paleo Bacon Meatballs.

IMG_0278These meatballs are amazing. The one thing that’s not so amazing is that you need a food processor with a shredding blade attachment to make them. You could give them a shot with super finely chopped bacon too, but shredding the bacon makes them awesome. Another thing you could use is a meat grinder. I saw one at the thrift store the last time I went, now I’m kicking myself for not grabbing it.

Every time I host something I think of making these. Depending on what the event is, it’s more than likely these delicious morsels will make an appearance. As a bonus you can stick them on toothpicks with lettuce and a cherry tomato for something resembling a bun-less burger. I bet you could wow guests if you turned these into actual burgers too. I’m going to try that after the wee one’s birthday party.

Bacon Meatballs

1 pound ground beef (preferably grass-fed)
1 pound nitrate-free bacon (or largest package you can find)
1 egg
1 Tablespoon chili powder (mild if serving to children)
Salt and pepper to taste
Cherry tomatoes and lettuce for garnish

  1. Set up your food processor with the shredding disc and shred the bacon. Do not separate the bacon slices: put the whole brick of bacon through at once.
  2. Mix the shredded bacon and ground beef. Add the egg and spices and mix thoroughly.
  3. Use a cookie dropper to drop meatballs onto a preheated pan and cook for 3 minutes before turning them over with tongs. Cook another 3-5 minutes, or until you cut the largest one in half and there is no pink.
  4. If you’re making a lot of these preheat your oven to 350° and bake portioned meatballs on a rimmed baking sheet for 20 minutes.

Bone Marrow!

IMG_0674Bone marrow was one of those things that never crossed my mind as edible. I always thought of marrow bones as dog bones, and a lot of people think of them the same way. It wasn’t until I read Ramiel Nagel’s book Cure Tooth Decay that I considered marrow to be food. Even though that book had convinced me to try it I still had to get over the ick-factor. I was raised on the standard American diet (SAD) and I pretty much only ever ate muscle meats. Why on Earth should I eat bone marrow (or liver)?

I started this blog as an outlet. People don’t want to hear about your food adventures in person, especially if you’re offering it as some form of advice. I have watched someone’s eyes glaze over in annoyance or disinterest many times while explaining food (even after being asked), so I brought it to the big wide world of the interwebs. On the interwebs I can’t see you being annoyed so I just keep going. It’s pretty great.

Anyway, the whole point of the above ramble was that I’m kind of off in the tall grass when it comes to diet and nutrition: I don’t follow the government guidelines or what mainstream nutritionists say. I never have anything less than whole milk in the refrigerator and I eat butter off the knife. So it seems like trying bone marrow wouldn’t have been weird for me, but I had my reservations. I have to say that I’m not a fan of eating it straight out of the bone. Many people love it this way but it isn’t for me, I didn’t like the texture. It’s a bit like eating semi-solid gelatin, which makes sense considering what it actually is.

The flavor of beef marrow bones, however, is a winner. What I’ve started doing is roasting them, taking the marrow out with a baby food spoon and melting it into quinoa or rice. The rich flavor it lends to the quinoa is amazing and it makes a veggie stir fry super filling.

As an added bonus I make beef stock out of the bones and marrow drippings that got left behind in the pan I roasted the bones in. Bone marrow broth makes a phenomenal minestrone soup!

To roast the bones preheat the oven to 450°, shake some salt and pepper on the wider end of the bone and set it in a baking dish with a rim. Shake salt and pepper on the top and roast them for 15 minutes, or until the edges are bubbly. If you don’t like eating things that are slightly pink, roast the bones for 2 to 3 minutes more. Once they’re roasted you can serve them as is or remove the marrow for some other purpose.

To make stock place the bones and any veggie scraps into a stock pock and cover with water. Use a bit of hot water to clean the marrow drippings out of the baking pan. Season however you’d like and bring to a boil. Reduce heat to medium-low and simmer, covered, for 2 to 3 hours. Strain and store, or enjoy for dinner!

Book Review: Cure Tooth Decay – Ramiel Nagel

I recently finished reading Cure Tooth Decay by Ramiel Nagel. It was an amazingly interesting read to say the least.

I purchased the book after playing an upside-down game with our toddler and realizing that one of his molars has a sizable brown spot on it. I had seen the book a lot around the web and decided it would be worth reading to help me decide what to do about the cavity. I’m a minimalist when it comes to any sort of intervention but I don’t always know what to do myself. This book is a good guide for helping teeth.

The first chapter covers modern dentistry and how it has failed. I tend to agree with the author on many of his points regarding the failure of modern dentistry, and the points he makes in the section about orthodontists (I had braces). The section on orthodontics – which is later in the book – really resonated with me because my orthodontist fixed my bite alignment and then promptly undid any progress by giving me invisalign braces for a “retainer”. So my bite is still messed up and I now feel obligated to fix it because there is mention of a misaligned jaw being a factor in several health issues in the same chapter about orthodontists.

I digress.

Back to dentistry: the author puts forward a new theory about what causes tooth decay. He states that poor nutrition, specifically a lack of certain vitamins and minerals, is the root (pun intended) cause of tooth decay. Modern dentistry is “waging a war on bacteria” and failing miserably, because any war on bacteria is pretty much doomed to fail at the outset. To illustrate his points he uses the research of Dr. Weston Price among other dentists. The thing that surprised me about modern dentistry’s push against bacteria, sugar and starch is that Dr. Weston Price was a well respected dentist. He published an article reviewing his extensive research and the conclusion that strong teeth are a direct result of a strong diet. Modern dentistry pretty much ignored his and other dentists research stating similar things.

This book is full of intriguing facts. Like the fact that feeding rats a diet of un-fermented oats causes rickets. There are lots of little trivia facts like that throughout that I found to be really interesting.

The book seems very well researched. There’s a good balance between scientific studies and personal experience the author uses to bring home his points. He offers feasible solutions for fixing the nutritional holes in your diet. There’s a plan for vegetarians –  if you’re vegan you are missing essential nutrients for healing your teeth by the nature of your diet alone and so you’re stuck with dentistry – that relies heavily on fish and fish products, which was nice of him to include. He does mention that he suspects the cause of his daughters severe tooth decay (which is what started his journey and writing this book) was his and his wife’s vegetarian diet during conception and pregnancy.

The author includes resources for finding good dentists, orthodontists, and (I think) orthopedists for fixing jaw problems. He also includes links to videos about specific teeth cleaning methods. Of course there is also the section citing all of the research studies he mentions in the book, and I think there’s a recommended reading section at the end (I lent my book to a friend and I don’t remember for sure, I’ll update when I have it back).

I disliked two things about this book. The first being that the author sneaks his personal opinions in. It’s not like he beats you over the head with them; he just adds them at the end of sentences sometimes. His opinions are stated as if everyone else feels the same and even though I agree with them, I found it a little off-putting. Doing that is sure to alienate a good portion of potential readers (like people who sympathize with industry, and there’s a little bit about vaccinations which is a good way to have a pitch-fork bearing mob show up at your door these days). The second thing I disliked is he made me a little uncomfortable when he started talking about having conversations with your tooth in order to see what was the best next step in terms of getting a filling or taking some other course of action. There’s also a section where he talks about healing dental trauma in a similar way. He talks about owning the feelings of the trauma and then realizing that it wasn’t the dentist doing it on purpose. It was a little bit shrink-y.

Otherwise this was a very pleasant read, which is saying a lot coming from me, because I usually have a really hard time reading non-fiction. The author presents the scientific findings and historical evidence in a way that is easy to understand and interesting to read. I hesitate to call it a page-turner, but I was really eager to finish it so that I might learn something new.

My verdict:
I very highly recommend this book. Even if you’re not struggling with tooth decay the information in here is very interesting and useful. Even though the author got a little weird at times it never lasted more than a few paragraphs before returning to scientific studies and general nutrition information. It’s totally worth spending money on.