Super Awesome Secret #3!

I’m sorry I missed the last two Fridays. We all got sick, and then I took some time for Thanksgiving. Usually I try to have a scheduled post up for holidays, but I was busy taking care of sick children and we also had a trip to Grand Junction scheduled, so I decided to not overwhelm myself.

Anyway, on to the secret!

Today’s secret is: use broth. Preferably bone broth.

Any crock pot recipe, soup recipe, savory gluten free bread recipe that calls for water as the liquid can be improved by using broth instead.

On a similar note, using milk for sweet breads (like cinnamon raisin bread) is also awesome.

Using broth instead of water adds flavor and richness to any dish, and it can help gluten free stuff with structure issues (like pizza crust). Not only that, if you cook your rice in broth instead of water you sneak some extra nutrients and flavor into your meal.

If you’re dairy free, using broth instead of milk in mashed potatoes is pretty awesome as well.

Pro tip: when making Alfredo sauce (dairy free or not) try using half broth and half cream instead of regular half and half. So if your recipe calls for 1 cup of half and half use 1/2 cup of broth and 1/2 cup of cream. If you’re making shrimp Alfredo use seafood broth for an even richer flavor!

Crock Pot Chicken Curry.

My crock pot is my best friend. If I know I’m going to have a busy evening I can start dinner that morning and not have to worry about cooking during what I affectionately refer to as “the witching hour.” Around the time I’m getting ready to start dinner, Hamlette is usually getting tired and a little cranky. I often end up backpacking her in the mei tai just so I can get food ready for a family dinner when Hubby gets home from work. If he’s not working, usually he can hold her while I cook, but if he’s home we eat at an earlier time.

20161028_141433Ah, the joys of shift work!

Anyway, crock pots. I can’t recommend them enough. There are loads of crock pot freezer meals that you can make ahead of time and then just dump the bag of goodies into the crock pot that morning for a lovely, no hassle, dinner. This isn’t one of those, but it’s still really easy.

As an added bonus: zucchini is super delicious in curry, so if you grow zucchini, or have a neighbor who is always trying to give you zucchini, this is a good way to use it up!

Chicken Curry

  • Servings: 8-10
  • Difficulty: easy
  • Print
1 pound chicken
1 1/2 cups chicken broth
1 zucchini, diced
4-6 cloves garlic
1/2 onion, chopped
2 Tbs dried basil
1 1/2 Tbs yellow curry powder
2 tsp salt
1 tsp fresh ginger, peeled and finely chopped
1 tsp chili powder
1 can full fat coconut milk
Fresh basil, chopped

  1. Combine everything but the coconut milk and the basil. Cover and cook on high for 3-4 hours or low for 6-8, until chicken is cooked through.
  2. 1 hour before serving add the coconut milk and shred the chicken.
  3. Serve over rice.


‘Tis the Season!

Autumn has begun and so has the pumpkin-ocalypse! Everything is slowly being consumed with pumpkin spice flavor, sometimes with amazing results and sometimes with head-scratching disgust.

So I thought I’d jump on the bandwagon! Heh.

20161023_132956I wanted to share a recipe with you guys for gluten free pumpkin breakfast muffins. They are really tasty! I found a recipe in a magazine for pumpkin cakes using regular flours and converted it to gluten free. These are perfect if you know you’re going to have a busy morning: you can make them the night before and take them with you to have breakfast on the go.

Don’t worry, t looks like it has a lot of ingredients, but that’s mostly because I broke up the pumpkin pie spice into separate measurements (because I don’t have the spice mix).

Pumpkin Muffins

  • Servings: 12
  • Difficulty: easy
  • Print
1 cup flour blend
1 cup gluten free oat flour
2 1/2 tsp baking powder
1 tsp cinnamon
1/2 tsp ground ginger
1/4 teaspoon nutmeg
1/4 teaspoon allspice
1/2 tsp salt
2 eggs
1/2 cup sucanat
1 cup almond milk
3/4 cup pumpkin puree
1/4 cup coconut oil, melted
2 tsp vanilla

  1. Preheat the oven to 325°F.
  2. Mix all the dry ingredients. Mix the wet ingredients in a separate bowl or measuring cup.
  3. Combine the dry and wet ingredients until smooth.
  4. Grease a muffin tin (or line with cupcake wrappers) and portion batter evenly between the cups. A cookie scoop works well for this.
  5. Bake for 30-35 minutes, rotating muffin tin halfway, until a toothpick comes out clean.
  6. Allow to cool in the muffin tin for 10 minutes on a wire rack before removing to cool completely.
  7. Store in an airtight container at room temperature for up to 3 days.

Dairy Free Skillet Cornbread.

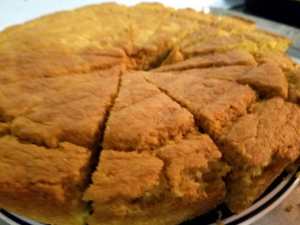
20161016_182003I apologize for the quality of this picture: I was in a hurry when I was taking it. So, while I took three separate pictures, none of them turned out very well.

Anyway, it’s getting to be a bit colder here, which is excellent chili weather. The best thing to eat with chili is cornbread (of course) so I make a lot of it. The trouble is that most recipes call for sour cream and milk, so I decided to try using some alternative ingredients.

This is the (super delicious) result. The recipe is a little bit of work, but it’s totally worth it.

Skillet Cornbread

  • Servings: 12
  • Difficulty: intermediate
  • Print
11 1/4 ounces cornmeal (2 1/4 cups)
1 1/2 cups plain coconut milk yogurt
1/2 cup almond milk
1/4 cup avocado oil
1/4 cup coconut oil
1 teaspoon baking powder
1 teaspoon baking soda
3/4 teaspoon teaspoon salt
2 large eggs

  1. Adjust oven racks to lower-middle and middle positions and heat oven to 450°F. Place a 10 inch skillet (preferably cast-iron) on the middle rack and heat for 10 minutes.
  2. Spread cornmeal on a rimmed baking sheet and toast on the bottom rack until fragrant and lightly browned, about 5 minutes.
  3. Transfer toasted cornmeal to a large bowl and whisk in yogurt and milk. Set aside.
  4. When skillet is hot, add the avocado oil and heat for another 5 minutes.
  5. Using potholders, remove the skillet from the oven and add the coconut oil to the hot avocado oil, swirling gently to incorporate. Pour hot oil mixture into the cornmeal mixture and whisk until combined (resist the urge to scrape the extra oil out with a spatula). Whisk in baking powder, baking soda and salt. The batter will immediately start to rise. This is normal.
  6. Whisk in the eggs then pour the batter into the hot skillet and place on the middle rack with a clean cookie sheet underneath to catch any drips that may occur.
  7. Bake for 12-15 minutes, or until the top begins to brown and crack and the sides are golden brown, rotating skillet halfway.
  8. Allow the bread to cool for 5 minutes in the skillet before flipping it out onto a cooling rack.
  9. Cool for 10 minutes and then serve.

Notes

  • This works best with yogurt that’s past it’s date, which basically means it is more sour than fresh yogurt. I usually keep an eye on the dairy discount section of the stores I frequent and make this whenever I pick up a tub of coconut milk yogurt that’s about to “go bad.”

Super Awesome Secret #2!

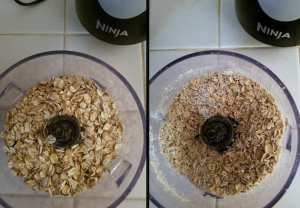
Instant Oatmeal is expensive. Luckily it’s also amazingly easy to make at home from regular oats. You can use quick cooking oats if you’d like, but I just use regular rolled oats, sometimes extra thick rolled oats. Basically I use whatever I have on hand.

Put the amount of oats you want to make into a blender or food processor and pulse until your oats look like the instant oats you get in the store. It takes my Ninja 10 pulses to get the right texture.oatsI don’t make these often because I prefer to ferment my oats before I make oatmeal for better nutrient availability, but this is great for those times you just need a quick snack.

You can portion them out into bags and add sucanat, salt, dried fruit, whatever you fancy. Bonus savings if you have a food dehydrator and can dehydrate your own strawberries or apples. You could even sprinkle cinnamon on the apples before you dehydrate them to make an apple cinnamon oatmeal.

Sweet Potato Pudding.

Well, here we are again. It’s Saturday. Oops.

Last night our little chicken died, we’re not sure what was wrong with her. She has always looked a little sickly, but I thought she had been looking better recently until she spent all day in the coop yesterday. Hubby opened the coop this morning and took care of her body. It’s a little sad, but life goes on.

On that note, today I’m sharing a recipe for a vegan pudding.

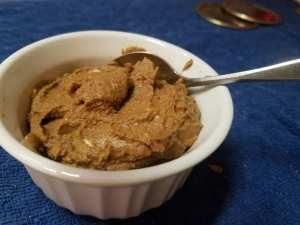
20161006_125006I love sweet potatoes and recently I’ve been buying them in bags (rather than loose) because Hamlette is really liking solid foods – she has 6 teeth already! I follow a paleo page on Facebook and they shared a recipe for sweet potato chocolate pudding I’d been wanting to try, but I couldn’t find it so I picked the first one I googled. I made that recipe but I didn’t like the texture at all so I tried mixing in some coconut milk. The coconut milk did the trick: the grainy mousse turned into a nice, smooth pudding.

Sweet Potato Chocolate Pudding

  • Servings: 4
  • Difficulty: easy
  • Print
2-3 medium sweet potatoes
1/4 cup cocoa powder
2 Tbs coconut oil
1 Tbs sweetener of choice
1 tsp vanilla
1/4-3/4 cup full fat coconut milk

  1. Bake the sweet potatoes for an hour at 350°F. Cool and peel the sweet potatoes.
  2. Blend everything but the coconut milk until smooth. At this point it will look a lot like a mousse.
  3. Scrape the chocolate mixture into a bowl and stir in the coconut milk until you reach a good consistency.
  4. Serve.

Notes

  • If making ahead, bring the pudding back to room temperature before eating: it firms up in the fridge and becomes less pudding-y
  • You could use melted cocoa butter instead of coconut oil for a richer flavor.

Gluten Free Peach Cobbler.

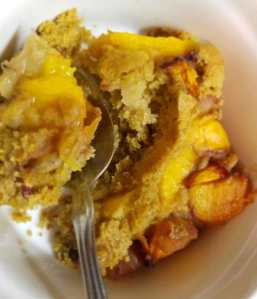
20160911_201718It’s peach season (sort of, it’s kind of the end of the season now) so we’ve got a lot of peaches. That means a lot of peach cobbler (and lots of frozen peaches). I’ve been experimenting with different recipes to get the perfect peach cobbler and I think I’ve done it. It’s perfectly bread-y, and just the right amount of sweet. This is one of those recipes that, if you didn’t say anything, no one would know it was gluten free. It’s also easy to make this vegan and, though I can’t personally vouch for this, I bet it’s equally delicious because coconut oil is amazing.

The first cobbler I made didn’t have enough cobbler base. It called for a 3 qt (I think) dish, so I looked on the bottom of my 9×13 pyrex and confirmed it was the proper size. I think what the recipe actually wanted me to use was something smaller with a higher lip. Anyway, what I ended up with was a cobbler that was good. It was reminiscent of the “graham” crackers I make sometimes in flavor, but it was just too thin.

20160911_201612The second cobbler was all oat flour and it was the perfect thickness in the 9×13 pan, but it called for a whopping 4 teaspoons of baking powder. When I was mixing everything together I thought, wow that is A LOT of baking powder! But gluten free cooking can be weird sometimes so i figured I’d just follow the recipe and see how it turned out. Well, it definitely had too much baking powder. You could taste the baking powder. Not good.

So the third (and fourth) cobbler(s) I made were a mix of the two recipes. This recipe is a winner. I took two photos of it, but I couldn’t pick which I liked best so I included both of them because I think they both show the texture of the cobbler accurately.

Gluten Free Peach Cobbler

  • Servings: 10
  • Difficulty: easy
  • Print
1 stick of unsalted butter (1/2 cup)
3/4 cup sucanat
1 cup flour blend
1 cup oat flour
2 teaspoon baking powder
1 teaspoon salt
1 cup milk (any kind, I used almond milk)
6 cups peaches

  1. Preheat the oven to 375°.
  2. Slice the peaches into a bowl. Peeling is optional.
  3. Mix batter together and pour into a greased 9×13 baking dish and spread to the edges using a spatula. The batter will start rising right after it’s mixed, this is normal, don’t worry!
  4. Pour in peaches, making sure they cover the entire surface of the batter and bake for 35-40 minutes until the cobbler is light brown.
  5. Allow to cool slightly before serving.
  6. Serve with heavy cream, ice cream, dairy free ice cream, or dairy free milk.

Chocolate Mousse.

IMG_0858I used to hate avocados. There. I said it. I feel like avocados are a strange food to dislike. Then again, my aunt doesn’t like chocolate, so I guess I’m not the only weirdo. Anyway, I don’t know what happened exactly, but after I had Hamling I loved avocados (and onions for some reason). I finally understood how my parents could just eat them with a spoon.

Now, after Hamlette, I cannot have enough avocado in my life. If there is something that has avocado in it or on it, I am far more likely to eat it than anything else put in front of me.

I also can’t get enough chocolate. Chocolate is the most amazing thing, it makes me happy to eat. Particularly truffles. AlterEco makes the best dark chocolate truffles I have ever had (from a store).

So here’s a recipe that is pretty much the best. But wait, avocados and chocolate? How could that possibly be good?

Oh, trust me, it is so good!IMG_0859

This also makes an excellent frosting or cake filling. This is the best paleo, vegan chocolate frosting you will ever make. On top of that, you pretty much can’t mess it up. It’s too easy to mess up. Which is great news for me because I fail at frosting on a regular basis.

Paleo, Vegan Chocolate Mousse

  • Servings: 4
  • Difficulty: easy peasy
  • Print
2 ripe avocados
1/2 cup cocoa powder
1/4 cup maple syrup
1 teaspoon vanilla extract

  1. Place avocados, cocoa powder, maple syrup and vanilla in the bowl of a food processor. Process until smooth.
  2. Taste. If it isn’t sweet enough, add more syrup, or a spoonful of honey.

Store for up to 3 days in the fridge. If you make this ahead the vanilla will bloom as it sits in the fridge and it will be extra delicious.

Cinnamon Raisin Bread (GF).

I’m finally back! We’ve had a very eventful month. I got sick on the week I was intending to post again and then we had a death in the family, so I took that week off as well. It seems like things are finally settling down, so here I am.

While I was away I discovered an awesome IMG_0831recipe for cinnamon raisin bread. And by ‘discovered’ I mean I tweaked an existing recipe to suit my fancy. It turned out really well! I’ve made it twice now and it’s never around for more than 24 hours, so I’m pretty sure it’s a success. I’m actually thinking of making it again this week, if I can summon the energy to go to the store.

Gluten Free Cinnamon Raisin Bread

  • Servings: 12-18
  • Difficulty: medium
  • Print
Filling
1/4 cup sucanat
4 teaspoons ground cinnamon
1 tablespoon potato starch

Dough
2 cups warm almond/coconut milk (110°F)
2 eggs
2 tablespoons coconut oil, melted
14 ounces (3 cups and 2 tablespoons) flour blend
4 ounces (1 1/3 cups) gluten free oat flour
3 tablespoons powdered psyllium husk
2 tablespoons sucanat
2 1/4 teaspoons instant or rapid-rise yeast
2 teaspoons baking powder
1 1/2 teaspoons salt
1 cup raisins

  1. Oil a loaf pan and set aside. Combine warm milk, eggs, and melted oil. Using a stand mixer with a paddle mix all dry ingredients until combined. Slowly pour milk mixture into the flour mixture and mix on low until the dough begins to come together (about 1 minute), scraping the bowl as needed. Increase speed to medium and beat until sticky and uniform (about 6 minutes). Reduce speed to low and add raisins, mixing until incorporated (30-60 seconds).
  2. While the dough is mixing combine the filling ingredients in a mortar and crush them all together. Crush until the sucanat is mostly fine (there will be some large pieces left, that’s okay)
  3. Brush oil onto a sheet of parchment paper. With wet hands, put half of the dough onto the sheet and pat into an 11×8 inch rectangle. Sprinkle half of the filling on top and use the parchment to roll the dough into a log. Pinch the seam together and place in the oiled bread pan, seam side up.
  4. Repeat with second half of dough, placing the seam side down.
  5. Line the bread pan with a foil collar to prevent the dough from spilling over the edge as it rises. You should have about an inch of foil from the top of the pan.
  6. Loosely cover with plastic wrap and let it rise for about 1 hour, or until the dough has risen 50%.
  7. Preheat the oven to 350°F. Remove plastic wrap, spray loaf with water and bake until golden and the loaf sounds hollow when tapped, about 1 1/2 hours, rotating pan halfway.
  8. Transfer to wire rack and allow to cool in the pan for 10 minutes. Remove the loaf from the pan and let it cool for as long as you can resist eating it.

No-Bake Vegan Mini “Cheesecake”

IMG_0726I’m generally not a fan of vegan things because, in my opinion, the vegan diet is unsustainable health wise. I think it’s an awesome reset diet, but not something that should be practiced long-term, and certainly not something you should be doing while pregnant. But that’s just my opinion. The reason I made these this Christmas is there are people in my family who have a hard time with dairy and eggs. I wanted to make a cheesecake, but I wanted everyone to be able to eat it. I had made a cashew-based “cheesecake” before with decent results, so I found a different recipe and modified it a bit.

These desserts are pretty amazing, because even vegan food can be amazing if you know what you’re doing. To top that off, they’re also really easy to make. All you need is a food processor and a little time.

Vegan Mini Cheesecake

  • Servings: 12-18
  • Difficulty: easy
  • Print
Crust:
1 cup pitted dates, soaked in warm water for 10 minutes and drained
1 cup soaked and dried almonds
1/4-1/2 teaspoon cinnamon (or to taste)
Filling:
1 1/2 cups “raw” cashew pieces
Juice of 1 medium-sized lemon
Generous 1/2 cup coconut cream
1/3 cup melted coconut oil
1/4 cup maple syrup
Ganache:
Equal parts coconut cream and semi-sweet chocolate chips.

  1. Soak almonds in salt water overnight. Drain and dry in a 170 °F oven until crispy (about 8 hours).
  2. Pour boiling water over the cashew pieces and let soak for 1 hour.
  3. Process almonds and cinnamon in food processor until you have a very coarse meal and add the drained dates. Process until a loose dough forms. Add dates or almonds as needed to adjust the consistency. As a general rule, start with more almonds/less dates and add dates if the dough is too dry.
  4. Grease a muffin pan (and a half, there will be extra batter) or line with paper liners. The paper liners are easier to remove, but greasing works reasonably well, just make sure your muffin pans fit in your freezer.
  5. Pack about 1/2 tablespoon of the crust into the bottom of the muffin cups. A spoon works really well for this.
  6. Rinse the food processor bowl and add the drained cashew pieces. Process until they start to form a dough.
  7. Add the lemon juice and process until smooth. Repeat with each ingredient, one at a time. This helps the texture of the final product. If you add everything at once you have a greater chance that the cheesecakes will be mealy rather than smooth.
  8. Pour into muffin cups, leaving some room on top.
  9. In a small saucepan add the coconut cream and heat until barely hot. Turn off the heat and add the chocolate chips. Stir until smooth. Using a small spoon (I used a sugar spoon, or a baby food spoon works as well) portion the ganache onto the cakes. Swirl with a toothpick.
  10. Cover with plastic wrap and chill for a minimum of 4 hours in the freezer (8 in the fridge, overnight is even better). If you just greased your muffin tins (no paper liners) you need to freeze these for removal. To remove the frozen cakes, just slide a butter knife in the edge and pop them out. If some of the crust stays behind, scrape it out and re-squish it to the bottom of the cake.
  11. Enjoy!

I used what was left of my coconut cream from the can I bought for the ganache: the solid contents of the can were slightly more than what I needed for the filling. I just weighed it on my kitchen scale. If I remember correctly I had about 1.6 ounces of cream. That was the perfect amount for all of the cakes and a little extra for me to enjoy after I was finished making them.

For this recipe, do not mix the coconut cream with the water in the can. Only use the solid part. If you shake your can and it sounds like the entire thing is liquid, pop it in the fridge while the almonds are soaking/drying (at least overnight) and it will separate nicely.

IMG_0722

This recipe is adapted from here.